How to install wordpress on subdomain or on a new domain easily
This guide explains how to install WordPress on a subdomain or on a new domain extra simply by using docker, no hard-core server management/FTP access required. At the same time you will host it on your server without side services.
First, order a new server/VPS instance. We recommend hosting WordPress on a separate VPS without other sites and applications. This allows easier setup and better isolation when it comes to technical issues.
To create a server use any affordable VPS hosting with public IP and Ubuntu OS. Average normal monthly price for server should be from 4$-12$/month. For example it could be one of the next on scaleway.com:
- Stardust1-s (1GB RAM, 1x86 CPU, 10 GB SSD)
- DEV1-S (2GB RAM, 2x86 CPU, 20 GB SSD)
You can use any other provider also, e.g. AWS EC2 instances. But what you need is an SSH root access. I am not promoting Scaleway here, but I am using them and they give root SSH access by default, for other hoster you might need to grant root access by doing some tricks, for example for AWS check the hint how to allow ssh root access.
After you created an instance, login in your terminal:
ssh root@instance_ip
Now you are on server, edit file with this command: sudo nano /etc/ssh/sshd_config
Add lines to the end:
PermitRootLogin yes
MaxSessions 500
MaxStartups 500
After this, apply the changes by:
service sshd restart
The settings above are required to properly work with docker builds which we will use.
Now install docker by running next command:
sudo apt update && sudo apt remove docker docker-engine docker.io && sudo apt install docker.io
If you already have a domain – we recommend to move it to Cloudflare Free Plan. This will allow you to connect very powerful CDN and get a free SSL certificate.
If you have no domain, you can register a new one with e.g. Namecheap/Godaddy, and then connect Cloudflare there (Use Custom DNS settings).
In Cloudflare you need to create one new record for your wordpress instance:

Name is your domain or subdomain for example: blog.site.com, or just site.com. Please note that orange Cloud in proxy status activates CDN (with DDoS protection) and SSL certificates from Cloudflare. This proxy mode works great with wordpress. If you had any other old records for your other app on this domain and you just switched to Cloudflare, you can disable Proxy mode for them, since there might be technical limitations (e.g. some exotic WebSocket implementations). When cloud is gray – Cloudflare will act like any other simple DNS server.
Now time to create a code which will deploy wordpress. Create a folder on your PC (better put it to some place which could be uploaded to cloud, e.g. Google Drive, or just GitHub repository).
Create files:
docker-compose.yml
version: '3.3'

services:
  db:
    network_mode: host
    image: mysql:5.7
    volumes:
      - db_data:/var/lib/mysql
    restart: always
    command: --default-authentication-plugin=mysql_native_password --character-set-server=utf8mb4 --collation-server=utf8mb4_bin
    environment:
      MYSQL_ROOT_PASSWORD: ${VAULT_MASTER_DB_PASS}
      MYSQL_DATABASE: wordpress
      MYSQL_USER: wordpress
      MYSQL_PASSWORD: ${VAULT_MASTER_DB_PASS}

  wordpress:
    network_mode: host
    depends_on:
      - db
    image: wordpress:latest
    restart: always
    environment:
      WORDPRESS_DB_HOST: 127.0.0.1:3306
      WORDPRESS_DB_USER: wordpress
      WORDPRESS_DB_PASSWORD: ${VAULT_MASTER_DB_PASS}
      WORDPRESS_DB_NAME: wordpress


volumes:
    db_data: {}
This files holds docker-compose resources.
deploy.sh
#!/bin/bash

HOST_DOMAIN=server_ip

export DOCKER_HOST=ssh://root@$HOST_DOMAIN

# cleanup cache from builds
docker builder prune -a -f
docker container prune -f
docker rmi $(docker images -f "dangling=true" -q) || true

# build and run
docker-compose -p stack-$branch -f docker-compose.yml up -d --build
Also create an .env file with mysql password config:
VAULT_MASTER_DB_PASS=xxxYYY
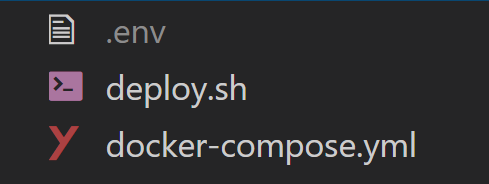
So in general you should receive 3 files:

Now in terminal on your PC run:
chmod +x deploy.sh
./deploy.sh
After this you can open domain e.g. site.com or blog.site.com and configure your Wordpress.

