Deploy SPA with servereless: easy practical guide

Cloud gives all abilities to deploy modern web applications of any complexity. In the previous guide, we learned how to create APIs using serverless. In this part, you will see a practical example of how to create a SPA frontend, deploy it and integrate with an API. If you don't know what is SPA check the SPA vs SSR hint. We will use React framework but the principle is same with any framework: Vue, Angular, etc. So we suggest you follow this guide "as is" to understand how it is working and only then adjust for your Framework if needed.
First of all, enter into a folder with your serverless project which already has an API deployed (created in the post about API). Now we need to read the current value of the endpoint base. To do it we can run serverless info command in this way:
serverless info --verbose --aws-profile devforthAccount --region us-east-1
At the bottom of output you will find:

The values here are outputs from CloudFromation stack (you can find them also in AWS Console). Copy the value of the ServiceEndpoint variable and store it in an exported environment variable:
export REACT_APP_API_BASE=https://<yourvalue>.execute-api.us-east-1.amazonaws.com/dev
Exported environment variable will be alive only in current bash session. So if you will reopen terminal you will have to execute this command again.
Environment varible name must start with REACT_APP_ , otherwise during build it will not be bundeled inside of SPA .js files
Now in the same directory run:
| npx create-react-app spa | |
| cd spa | |
| npm run start |
This creates React SPA boilerplate and starts so-called development server (dev server).
Also, add pattern settings to the top level of serverless.yml which will ignore our SPA:
| package: | |
| patterns: | |
| - '!spa/**' |
This is needed to completly exclude spa folder from serverless builder. Otherwise build process will be slow down and you might upload much more traffic to AWS. Probably you will also prefer just keeping your SPA in other directory then serverless project.
Replace App.js content with this:
| import './App.css'; | |
| import React from 'react'; | |
| class App extends React.Component { | |
| constructor(props) { | |
| super(props); | |
| this.state = { | |
| error: null, | |
| isLoaded: false, | |
| notes: [] | |
| }; | |
| } | |
| componentDidMount() { | |
| fetch(`${process.env.REACT_APP_API_BASE}/list`) | |
| .then(res => res.json()) | |
| .then( | |
| (result) => { | |
| this.setState({ | |
| isLoaded: true, | |
| notes: result.notes | |
| }); | |
| }, | |
| // Note: it's important to handle errors here | |
| // instead of a catch() block so that we don't swallow | |
| // exceptions from actual bugs in components. | |
| (error) => { | |
| this.setState({ | |
| isLoaded: true, | |
| error | |
| }); | |
| } | |
| ) | |
| } | |
| render() { | |
| return ( | |
| <div className="App"> | |
| <header className="App-header"> | |
| <h1>Notes list</h1> | |
| { | |
| !this.state.isLoaded? | |
| (<div>Loading..</div>): | |
| this.state.notes.map((item) => | |
| <div> | |
| <small>{new Date(item.addedTime).toDateString()}:</small><br/> | |
| { item.text } | |
| </div> | |
| ) | |
| } | |
| </header> | |
| </div> | |
| ); | |
| } | |
| } | |
| export default App; |
The auto-reload server should automatically reflect the changes.
Only one thing left: allow CORS for GET method which we are going to call with fetch. Add this code to list notes lambda and then redeploy stack:
| return { | |
| statusCode: 200, | |
| headers: { | |
| 'Access-Control-Allow-Origin': '*', | |
| 'Access-Control-Allow-Credentials': false, // true if you will need to attach Authorization headers/Any cookies/TLS client certificates | |
| }, | |
| ... |
Now let's add a test note using curl, and refresh page with SPA, we should see:
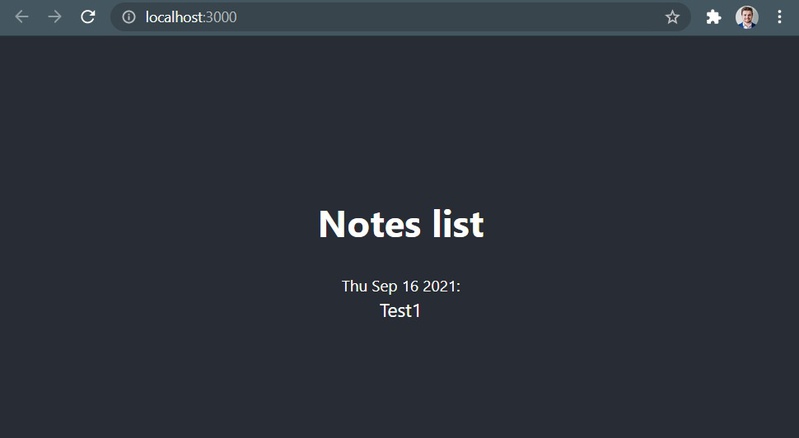
But it is only local SPA executed on the dev server. Now let's learn how to deploy our SPA into the cloud.
To do it we will use 2 services: S3 + CloudFront. New S3 Bucket will serve SPA files and CloudFront will deliver them to users. Actually, the S3 bucket could serve the frontend itself but it has significant drawbacks:
- CloudFront in the future will allow you to connect any custom domain when hosting from S3 will give you a pretty ugly "technical" URL
- CloudFront is actually caching CDN so it will cache files on servers that are close to your clients and will serve them much faster.
Now add new resources into the serverless file:
| ## Specifying the S3 Bucket which will server SPA | |
| WebAppS3Bucket: | |
| Type: AWS::S3::Bucket | |
| Properties: | |
| BucketName: ${self:custom.SpaS3BucketName} | |
| AccessControl: PublicRead | |
| WebsiteConfiguration: | |
| IndexDocument: index.html | |
| ErrorDocument: index.html | |
| ## Specifying the policies to make sure all files inside the Bucket are avaialble to CloudFront | |
| WebAppS3BucketPolicy: | |
| Type: AWS::S3::BucketPolicy | |
| Properties: | |
| Bucket: | |
| Ref: WebAppS3Bucket | |
| PolicyDocument: | |
| Statement: | |
| - Sid: PublicReadGetObject | |
| Effect: Allow | |
| Principal: "*" | |
| Action: | |
| - s3:GetObject | |
| Resource: arn:aws:s3:::${self:custom.SpaS3BucketName}/* | |
| ## Specifying the CloudFront Distribution to server your Web Application | |
| SpaCloudFrontDistribution: | |
| Type: AWS::CloudFront::Distribution | |
| Properties: | |
| DistributionConfig: | |
| Origins: | |
| - DomainName: ${self:custom.SpaS3BucketName}.s3.amazonaws.com | |
| ## An identifier for the origin which must be unique within the distribution | |
| Id: WebApp | |
| CustomOriginConfig: | |
| HTTPPort: 80 | |
| HTTPSPort: 443 | |
| OriginProtocolPolicy: https-only | |
| Enabled: 'true' | |
| ## Uncomment the following section in case you are using a custom domain | |
| # Aliases: | |
| # - mysite.example.com | |
| DefaultRootObject: index.html | |
| ## Since the Single Page App is taking care of the routing we need to make sure ever path is served with index.html | |
| ## The only exception are files that actually exist e.h. app.js, reset.css | |
| CustomErrorResponses: | |
| - ErrorCode: 404 | |
| ResponseCode: 200 | |
| ResponsePagePath: /index.html | |
| DefaultCacheBehavior: | |
| AllowedMethods: | |
| - DELETE | |
| - GET | |
| - HEAD | |
| - OPTIONS | |
| - PATCH | |
| - POST | |
| - PUT | |
| TargetOriginId: WebApp | |
| ## Defining if and how the QueryString and Cookies are forwarded to the origin which in this case is S3 | |
| ForwardedValues: | |
| QueryString: 'false' | |
| Cookies: | |
| Forward: none | |
| ViewerProtocolPolicy: redirect-to-https | |
| ViewerCertificate: | |
| CloudFrontDefaultCertificate: 'true' | |
| Outputs: | |
| CloudFrontDistributionDomain: | |
| Value: | |
| 'Fn::GetAtt': [ SpaCloudFrontDistribution, DomainName ] | |
| CloudFrontDistributionId: | |
| Value: | |
| !Ref SpaCloudFrontDistribution | |
| SpaS3BucketName: | |
| Value: ${self:custom.SpaS3BucketName} |
Also, add a custom variable to top-level serverless configuration:
| custom: | |
| SpaS3BucketName: aws-demo-spa-1 |
Now redeploy stack.
If you have a fresh AWS account you might receive an error message Your account must be verified before you can add new CloudFront resources. To verify your account, please contact AWS Support (https://console.aws.amazon.com/support/home#/) and include this error message. Just do what it says and contact support: Support / New case / Account and billing support / Type: Account / Category: ActivationIf they will say you have to request a limit increase on using CloudFront. 1) Navigate to: Support / New case / Service limit increase. 2) Limit type: CloudFront Distributions. 3) In Requests select: Limit: Web Distributions per Account, New limit value: 3 (example). Approval might take an hour(s) or even more in "post-COVID" world
Outputs section
Please check out the new "Outputs" section. This is a way to export strings with some identifiers from the CloudFormation stack. We already used serverless info --verbose the command to read ServiceEndpoint output. The ServiceEndpoint is created by a serverless framework, and here we just add custom outputs to be able to read CloudFront ID, Domain, Bucket Name. We will use it to upload SPA.
Build SPA and upload it to S3
If all went smoothly then we created CloudFront distribution and connected it to S3 bucket. S3 bucket is our upstream: CloudFront itself is CDN, so it does not store our app, however, it proxies HTTP requests to upstream (S3) and caches responses on the server which is close to the user. If we want to clear cache, we create so-called invalidation.
But S3 bucket is empty right now, so we need to build our SPA and copy files to it. To build SPA we need to execute npm run build command. Then we can copy files using AWS CLI utility. Please install it using apt:
$ sudo apt install awscli
I got the next version:
| aws --version | |
| aws-cli/1.18.69 Python/3.8.5 Linux/4.19.128-microsoft-standard botocore/1.16.19 |
To automate deployment we will create a file deploy.sh under spa directory:
| #!/bin/bash | |
| AWS_ACCOUNT=$1 | |
| AWS_REGION=us-east-1 | |
| SPA_BUILT_DIR=build | |
| if ! command -v aws &> /dev/null | |
| then | |
| echo "🛑 AWS CLI could not be found, please install it" | |
| exit | |
| fi | |
| if [ -z "$AWS_ACCOUNT" ] | |
| then | |
| echo "🛑 Please pass AWS account name as first argument" | |
| exit -1 | |
| fi | |
| SCRIPT_DIR=$(cd -P -- "$(dirname -- "$0")" && pwd -P) | |
| SERVERLESS_STACK_OUTPUT="$(cd $SCRIPT_DIR && cd .. && serverless info --verbose --aws-profile $AWS_ACCOUNT --region $AWS_REGION)" | |
| cd $SCRIPT_DIR | |
| export REACT_APP_API_BASE=`echo "$SERVERLESS_STACK_OUTPUT" | grep ServiceEndpoint | sed 's/^.*: //'` | |
| if [ -z "$REACT_APP_API_BASE" ] | |
| then | |
| echo "🛑 Can't read endpint base, run serverless info --verbose directly to check why" | |
| exit -1 | |
| fi | |
| BUCKET_NAME=`echo "$SERVERLESS_STACK_OUTPUT" | grep SpaS3BucketName | sed 's/^.*: //'` | |
| CLOUD_FRONT_ID=`echo "$SERVERLESS_STACK_OUTPUT" | grep CloudFrontDistributionId | sed 's/^.*: //'` | |
| CLOUD_FRONT_DOMAIN=`echo "$SERVERLESS_STACK_OUTPUT" | grep CloudFrontDistributionDomain | sed 's/^.*: //'` | |
| npm run build | |
| aws --profile $AWS_ACCOUNT --region $AWS_REGION s3 sync --cache-control 'max-age=31536000' --exclude index.html $SPA_BUILT_DIR/ s3://$BUCKET_NAME/ | |
| aws --profile $AWS_ACCOUNT --region $AWS_REGION s3 sync --cache-control 'no-cache' $SPA_BUILT_DIR/ s3://$BUCKET_NAME/ | |
| echo "App deployed 🎉: https://${CLOUD_FRONT_DOMAIN}" |
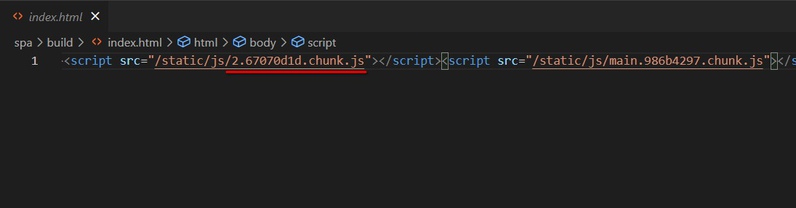
Our react app has built-in cache invalidation for static files. Filenames of our static assets have hashes in the filenames, so if the content of the file will be changed after rebuild, the filename will also be changed:
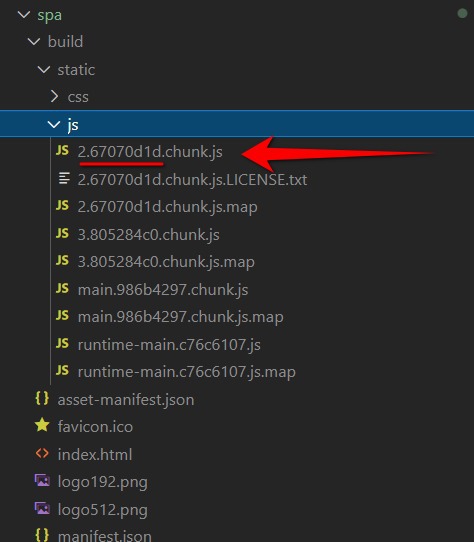
And index.html file just links them using the script tag:
So we can safely allow caching for all static resources for a very large period of time (we cache for 31536000s = 1 year) but we need to take care of preventing caching for index.html (because it has actualized links to updated static files). Our index.html file is very lightweight so it is ok to always proxy requests to upstream.
If after rebuilt some large static file will be changed, the old version will still be saved in CDN cache or in the user browse but it is ok, because after SPA reload user will get uncached actualized index.html so the cache will be invalidated.
If somehow it happened that you need to update some file and have no ability to apply filename hashing (happens rarely and is a sign of incompetence of the developer), then you can run invalidation on CDN implicitly (but you still can't clear the user browser's cache):
aws --profile $AWS_ACCOUNT cloudfront create-invalidation --distribution-id ${CLOUD_FRONT_ID} --paths '/*'
We always recommend to use tools like Create React App or Vue CLI or Angular CLI, and never try to mange webpack configuration for yourself because such built-in tools will do right caching-safe setup for you. I've seen a lot of "webpack guru" who made webpack setup by hands and was not able implement right hashing for all files 😟
Make the file executable:
chmod +x spa/deploy.sh
Run it:
./spa/deploy.sh
After deployment is done you should see the domain and be able to access your SPA on it.
Task 2.1. Add buttons to delete notes
Near each note place trash bin icon (find some SVG on the web), it can look like this:
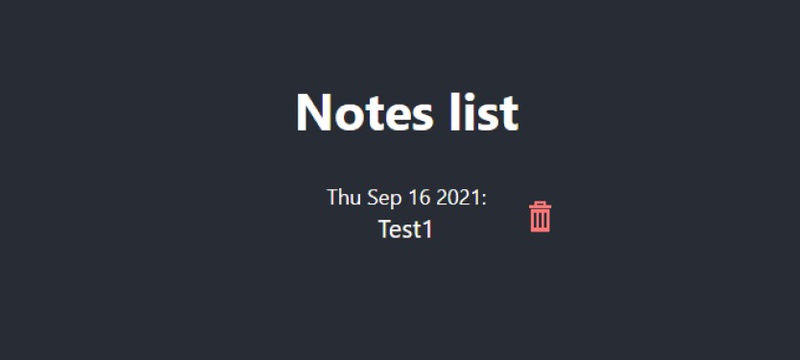
When the user presses the button we ask him for a confirmation (e.g. using plain window.confirm) then when the user confirms deletion we call API that deletes note by ID (id is passed from frontend). After deletion list is refreshed.
Task 2.2. Add ability to create notes
Create 2 routes: one for adding notes another for showing list. Use Painterro npm package. Use textarea tag to enter text.
Try to understand task by image:

Task 2.3. Replace custom styles with MIU library
Install https://mui.com/ into your React App and replace all inputs (textarea, buttons) with standard components from MUI. Add App bar component and 2 links in the menu: "Add note", "Notes list"
Task 2.4. Connect Cognito to implement Authorization
- Add
/signuppage (should have 3 fields and one button: username and password with confirmation) - Add
/signinpage (should have 2 fields and one button) - Use amazon-cognito-identity-js on the frontend to integrate Cognito for registering and signing in.
- When the user creates a note, save the Username in each note stored in DynamoDB Table. You can read the username from event object passed to the lambda.
- List API endpoint should only return own notes to the users.