Elastic IP AWS for your EC2 instance
Here is way to allocate and associate elastic IP to your EC2 instance.
🛑 Can't change already assigned temporary IP address of EC2 instance.
🛑 Your IP will be changed
✨ Allocated IP that you can asocciate to any EC2 instance
✨ You can reboot your EC2 instance and dont worry about loosing of instance IP address
✨ Changing EC2 instance and have same IP address
Steps to allocate and associate Elastic IP on AWS:
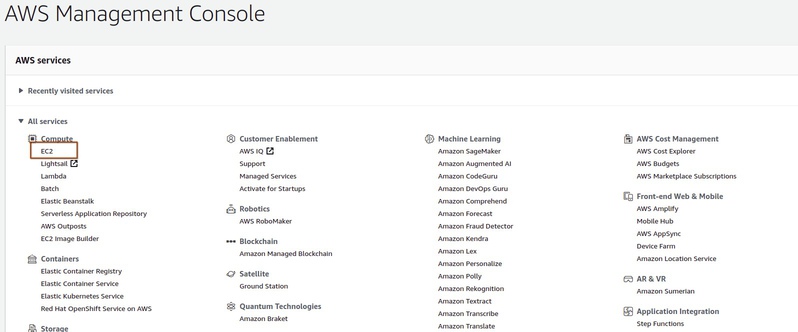
- Open the AWS Management Console, click the EC2 link, and display the page associated with your region.
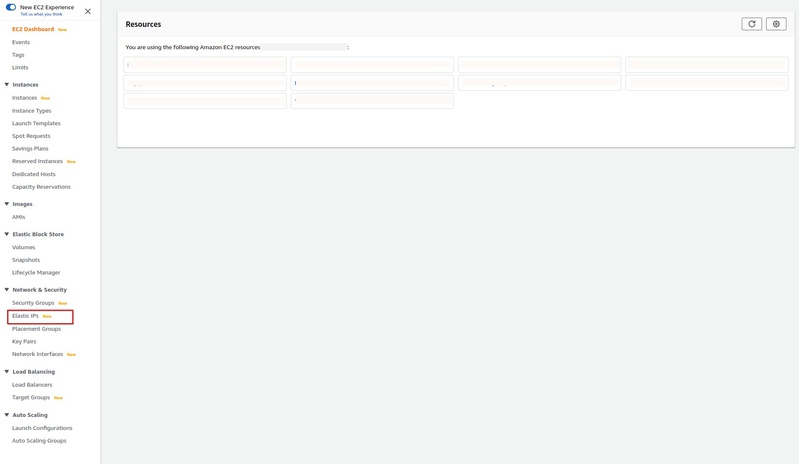
- Click the Elastic IPs link in the EC2 Dashboard.
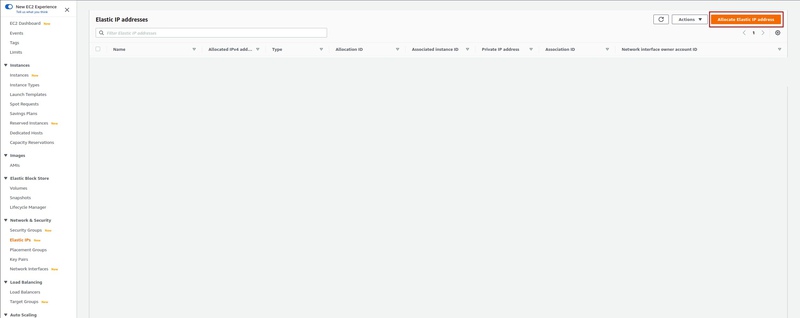
- Click Allocate New Address and choose VPC or EC2 from the drop-down list, depending whether you're going to associate this IP with an instance in Amazon EC2-Virtual Private Cloud (VPC) or Amazon EC2-Classic, respectively. Click "Yes, Allocate" to confirm your choice.
- Right-click the newly created Elastic IP and choose Associate Address.
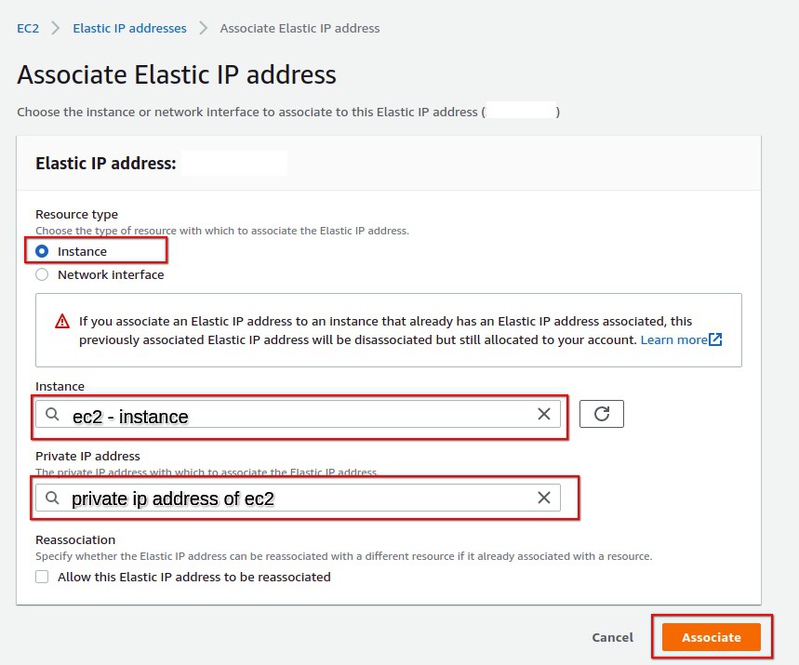
- Choose your desired EC2 instance from the drop-down list of running instances and click Associate.
Let's see on real example, step by step. Open AWS Console and choose EC2 service.

On left side you'll see list of services for EC2. Click on "Elastic IP"

You will able to see next window. There's no Elastic IPs if you haven't allocated any yet. You need to allocate one by clicking "Allocate Elastic IP address". In next dialog just press "Allocate" and don't change anything there.

After Elastic IP created - choose in notification "Associate this Elastic IP address" or in the "Actions" > "Associate Elastic IP address"

Next dialog just set your EC2 instance for this Elastic IP and set private IP address. In most cases there will be one instance -> one private IP.

And DONE. You allocated Elastic IP address and associated it to you EC2 instance. It will help you not to lose IP address of instance if it will rebooted or terminated. Also you can change instance for more powerful and not change IP of this instance ( just need to reassign your Elastic IP for new EC2 instance)
